Friday, 14 June 2013

IIS URL Rewrite – Hosting multiple domains under one site

In a shared hosting environment, it’s a common desire to have a single IIS website that handles multiple sites with different domain names.  This saves the cost of setting up additional sites with the hoster. 
At ORCS Web, we’ve supported this situation for many years using ISAPI Rewrite.  Now, withURL Rewrite for IIS 7, it’s easier and it’s integrated right into web.config.  In this blog post I’ll set out to cover the essentials for hosting multiple domain names under a single account using URL Rewrite.
This post assumes that you are using URL Rewrite 1.0, 1.1 or 2.0.  I’ll follow-up in a later post on more advanced ways to take this further yet, using the new features of URL Rewrite 2.0.
Part II will cover the outgoing rules available in URL Rewrite 2.0 to take this a step further.
First, the file structure
Let’s lay out the directory structure for this example.  Assume that you have 3 domain names.  They are: masterdomain.com, site2.com and hawaiivisit.site2.com.  You’ve created your directory structure like this:


Let’s assume that masterdomain.com was already in the root of the site and can’t easily be moved.  However, site2.com and hawaiivisit.site.com need to be set up.  Each of these folders have a website within them.
Directing the domain name to the server
First, make sure that when you browse to the website by domain name, that it resolves to the correct IP address.  This is handled at the DNS level.  Your DNS entry for site2.com and hawaiivisit.site2.com will often be identical to masterdomain.com and are managed through your DNS provider.
Catching the site when on the server
If you host with a web hosting company then they will take care of this.  If you host yourself, make sure to set a site binding so that the expected site processes the domain name.  If you use host headers, be sure to add the extra bindings for them.
Redirecting the site to a subfolder
Now that you have the domain name directed to the server and site, URL Rewrite comes in to direct it to a subfolder.
First, make sure that your web host supports URL Rewrite on the server that you’re hosted on.  The following assumes that it’s installed and supported.
You can use IIS 7 Manager which gives a friendly interface for creating rules.  If you prefer to write them directly in web.config, I’ll include the rules below.
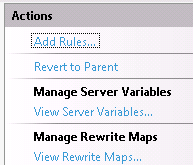
First, open up URL Rewrite:

I’ve come to prefer RegEx rules instead of wildcard rules.  I find that wildcard rules reach their limit pretty quickly.  Regular expressions can be daunting at first but it’s pretty easy to pick up the basics.  Here’s an excellent reference to get started: http://www.regular-expressions.info/reference.html
To create the rule click on “Add Rules…”.

Select the “Blank Rule” template and click OK.
For the name, enter your domain name, or whatever makes the most sense to you.
Match URL section
In the Match URL Section, leave the defaults to match the pattern and Regular Expressions.  For the pattern, enter (.*) without the parentheses.  The “URL” is the part after the domain name.  i.e. www.ThisIsTheDomain.com/ThisIsTheURL.  It’s the domain that we’re interested in now, not the URL.
Conditions
The Conditions section is where we’ll do most of the work.  Expand that section if it’s collapsed and click “Add”. 
The domain name is contained within the HTTP header called {HTTP_HOST}.  Here’s where the fun comes.  The regular expression pattern that will match www.site2.com or site2.com (without the www) looks like this: ^(www.)?site2.com$. 
Here’s what that means. 
  • The ^ is the character that signifies the start of the string.  That ensures that something.www.site2.com doesn’t also get included with this rule.
  • The $ is the character that marks the end of the string.
  • ( ) parentheses are used to create section groups. 
  • ? means that something is optional.
  • Therefore, (www.)? means that with www. or without, either are accepted.
After filling in these fields you should have something like the following:

Now, here’s the part that many people wouldn’t guess at first.  Since URL Rewrite works on the URL only, while most code (ASP.NET, ASP, PHP, etc) works at the server level, they aren’t aware of each other.  Just because you rewrite the URL doesn’t mean that the code has any clue of the change.  As a result, any time that ASP.NET automatically creates the path, it will likely clash with the URL Rewrite rule.  For example, Response.Redirect(“~/”) will redirect to the root of the application.  That means that it can create a path like www.site2.com/site2.  Notice the extra site2 in the path.  The login page for ASP.NET will mess with you too.
future blog post will cover how to hide the /site2 using URL Rewrite 2.0, but the easy solution is to ensure that www.site2.com and www.site2.com/site2 both go to the same place.  Both should be served from …\masterdomain.com\site2.  It means that the URL can be longer than you may prefer, but it allows the site to continue to function.
To achieve this, add an exclusion condition so that this rule doesn’t redirect at all if the URL starts with /site2/.
There are 2 ways to achieve this.  You could go back to the URL section where we previously entered .* and update that section.  There isn’t anything wrong with that at all.  For no particular reason that I can think of right now, I prefer to do this from the conditions section.  Here’s how to do it:
Add another condition where the condition input is {PATH_INFO}, and set the dropdown to “Does Not Match the Pattern”, and set the Pattern to ^/site2/.  That means that the PATH_INFO must start with /site2/.  Note that you shouldn’t end with the $ this time because you want sub-sub folders to work too.  It should look like this:

Action Section
We’re nearly done.  In the Action section, first set the “Action Type” to Rewrite.  Then set the Rewrite URL to \site2\{R:0} and ensure that the “Append query string” checkbox is checked.  The {R:0} is a back reference to the URL.  It will allow the URL to be carried through dynamically in the request.  The Append query string ensures that the query string itself will carry through.
The complete rule should look like this:

That’s it.  Save and test.
Using a Text Editor
You may prefer to use a text editor or to see the config directly.  The rule generated for web.config looks like this:
<rewrite>
    <rules>
        <rule name="site2.com" stopProcessing="true">
            <match url=".*" />
            <conditions>
                <add input="{HTTP_HOST}" pattern="^(www.)?site2.com" />
                <add input="{PATH_INFO}" pattern="^/site2/" negate="true" />
            </conditions>
            <action type="Rewrite" url="\site2\{R:0}" />
        </rule>
    </rules>
</rewrite>
And, the rule for hawaiivisit.site2.com is similar.  It looks like this:
<rewrite>
    <rules>
        <rule name="hawaiivisit.site2.com" stopProcessing="true">
            <match url=".*" />
            <conditions>
                <add input="{HTTP_HOST}" pattern="^hawaiivisit.site2.com$" />
                <add input="{PATH_INFO}" pattern="^/hawaiivisit/" negate="true" />
            </conditions>
            <action type="Rewrite" url="\hawaiivisit\{R:0}" />
        </rule>
    </rules>
</rewrite>
The other things
I wanted to briefly mention what isn’t covered in this blog post that you may want to consider. 
  • DNS. The ‘how to’ for your domain name purchase and directing isn’t covered here.
  • Statistics. If you use  a client-side option like Google Analytics then this will work just as well under a single account.  However, if you are using a log based statistics program like SmarterStats then it’s up to you to set rules in SmarterStats to filter out or sub-divide the statistics into useful sections i.e. 1 per site.
  • Email. You will likely need to setup another mail account with your host, or add the new domain as a domain alias to your existing account.
  • ASP.NET inheritance. web.config inherits down the entire path but the ASP.NET folders do not inherit past application boundaries.  More on that here.  One workaround if ASP.NET inheritance fights with you is to not have a site in the website root.  Instead, place all sites in their own subfolder.
  • You’ll likely need to mark the folder as an application so that it is an ASP.NET application.  (assuming ASP.NET of course)


Thursday, 13 June 2013

3 Tier and 4-Tier Architecture in ASP.NET with C#


Hi
So many my close friend requested me to write the tier archecture project in asp.net. I m not a expert developer,but whatever i m knowing i will share here. If you think, this is not a good approach or good practice then feel free to correct me.
Here i m assuming that you have the basis knowledge of store procedure, asp.net and C#
In this artical, we will learn the following concept
a. How to use “Multiview Control” of asp.net. It is one of the excellent control which came with asp.net 2.0. Using this control we can display different view of one page without writing the tedious code.
b. How to write the conditional store procedure. Using condition store procedure we can reduce so much C# code. It will also give good performance as compare to doing every things with C# or vb.net code.
c. How to insert,update and delete with image and displaying in DataGridview
d.How to customize the DataGridview on basis of our requirement
e.How to seperate the code in different layer
In this sample project, we will create 4 tier i.e
1. UI part
2. BE(Bussiness Entity)
3. BAL(Bussiness Access Layer)
4. DAL(Data Acess Layer)
Now we will start like this steps
Step1: Create one asp.net web site from visual studio. Here i have used Visual studio 2011
Step2: Add the new project like this img and give name BE
Step3: Like this img you create BAL and DAL
Now in asp.net project add new page i.e Home.aspx and html design will be like this
<%@ Page Language="C#" AutoEventWireup="true" CodeBehind="Home.aspx.cs" Inherits="_3Tier_Sample.Home" %>
<!DOCTYPE html>
<html xmlns="http://www.w3.org/1999/xhtml"&gt;
<head runat="server">
<title></title>
<style type="text/css">
.auto-style1 {
width: 78%;
}
.auto-style3 {
width: 130px;
}
.auto-style4 {
width: 159px;
}
.auto-style5 {
width: 340px;
}
.auto-style6 {
width: 340px;
height: 26px;
}
.auto-style7 {
width: 130px;
height: 26px;
}
.auto-style8 {
width: 159px;
height: 26px;
}
.auto-style9 {
height: 26px;
}
</style>
</head>
<body>
<form id="form1" runat="server">
<div>
<br />
<br />
<asp:MultiView ID="MV1" runat="server">
<asp:View ID="View1" runat="server">
<fieldset style="width: 739px">
<legend>Emp Details</legend>
<table class="auto-style1">
<tr>
<td class="auto-style5">&nbsp;</td>
<td class="auto-style3">EmpName</td>
<td class="auto-style4">
<asp:TextBox ID="txtEmpName" runat="server"></asp:TextBox>
</td>
<td>
<asp:RegularExpressionValidator ID="RegularExpressionValidator1" runat="server" ForeColor="Red"
ControlToValidate="txtEmpName" ErrorMessage="(Required)" SetFocusOnError="True"></asp:RegularExpressionValidator>
</td>
</tr>
<tr>
<td class="auto-style5">&nbsp;</td>
<td class="auto-style3">&nbsp;</td>
<td class="auto-style4">&nbsp;</td>
<td>&nbsp;</td>
</tr>
<tr>
<td class="auto-style5">&nbsp;</td>
<td class="auto-style3">EmpAddress</td>
<td class="auto-style4">
<asp:TextBox ID="txtEmpAddress" runat="server" TextMode="MultiLine"></asp:TextBox>
</td>
<td>
<asp:RegularExpressionValidator ID="RegularExpressionValidator2" runat="server"
ControlToValidate="txtEmpAddress" ErrorMessage="(Required)" ForeColor="Red"
SetFocusOnError="True"></asp:RegularExpressionValidator>
</td>
</tr>
<tr>
<td class="auto-style5">&nbsp;</td>
<td class="auto-style3">&nbsp;</td>
<td class="auto-style4">&nbsp;</td>
<td>&nbsp;</td>
</tr>
<tr>
<td class="auto-style5">&nbsp;</td>
<td class="auto-style3">MobileNo</td>
<td class="auto-style4">
<asp:TextBox ID="txtMobileNo" runat="server"></asp:TextBox>
</td>
<td>
<asp:RegularExpressionValidator ID="RegularExpressionValidator3" runat="server"
ControlToValidate="txtMobileNo" ErrorMessage="(Required)" ForeColor="Red"
SetFocusOnError="True"></asp:RegularExpressionValidator>
</td>
</tr>
<tr>
<td class="auto-style5">&nbsp;</td>
<td class="auto-style3">&nbsp;</td>
<td class="auto-style4">&nbsp;</td>
<td>&nbsp;</td>
</tr>
<tr>
<td class="auto-style6"></td>
<td class="auto-style7">EmailId</td>
<td class="auto-style8">
<asp:TextBox ID="txtEmailId" runat="server"></asp:TextBox>
</td>
<td class="auto-style9">
<asp:RegularExpressionValidator ID="RegularExpressionValidator4" runat="server"
ControlToValidate="txtEmailId" ErrorMessage="(Required)" ForeColor="Red"
SetFocusOnError="True"></asp:RegularExpressionValidator>
</td>
</tr>
<tr>
<td class="auto-style5">&nbsp;</td>
<td class="auto-style3">&nbsp;</td>
<td class="auto-style4">&nbsp;</td>
<td>&nbsp;</td>
</tr>
<tr>
<td class="auto-style5">&nbsp;</td>
<td class="auto-style3">Emp Pic</td>
<td class="auto-style4">
<asp:FileUpload ID="fileUploadEmpImg" runat="server" />
</td>
<td>&nbsp;</td>
</tr>
<tr>
<td class="auto-style5">&nbsp;</td>
<td class="auto-style3">&nbsp;</td>
<td class="auto-style4">&nbsp;</td>
<td>&nbsp;</td>
</tr>
<tr>
<td class="auto-style5">&nbsp;</td>
<td class="auto-style3">&nbsp;</td>
<td class="auto-style4">
<asp:Button ID="BtnSubmit" runat="server" Text="Submit"
OnClick="BtnSubmit_Click" />
</td>
<td>
<asp:HiddenField ID="HiddenField1" runat="server" />
</td>
</tr>
<tr>
<td class="auto-style5">&nbsp;</td>
<td class="auto-style3">
<asp:LinkButton ID="LnkViewAll" OnClick="LnkViewAll_Click" CausesValidation="false" runat="server">View All Emp</asp:LinkButton>
</td>
<td class="auto-style4">
<asp:Label ID="lblmsg" runat="server" ForeColor="#FF0066"></asp:Label>
</td>
<td>&nbsp;</td>
</tr>
</table>
</fieldset>
</asp:View>
<asp:View ID="View2" runat="server">
<div style="margin-left: 100px">
<asp:GridView ID="GridView1" runat="server" AutoGenerateColumns="False"
CellPadding="4" Width="748px"
OnPageIndexChanging="GridView1_PageIndexChanging"
OnRowCommand="GridView1_RowCommand" OnRowDeleting="GridView1_RowDeleting"
OnRowEditing="GridView1_RowEditing" ForeColor="#333333">
<AlternatingRowStyle BackColor="White" />
<Columns>
<asp:TemplateField HeaderText="SI.No">
<ItemTemplate>
<%#Container.DataItemIndex 1 %>
</ItemTemplate>
</asp:TemplateField>
<asp:BoundField DataField="EmpName" HeaderText="EmpName" />
<asp:BoundField DataField="EmpAddress" HeaderText="EmpAddress" />
<asp:BoundField DataField="MobileNo" HeaderText="MobileNo" />
<asp:BoundField DataField="EmailId" HeaderText="EmailId" />
<asp:TemplateField HeaderText="Image">
<ItemTemplate>
<asp:Image ID="Img1" runat="server" Height="100px"
ImageUrl='<%#"~/EmpImg/" Eval("Img1")%>' Width="100px" />
</ItemTemplate>
</asp:TemplateField>
<asp:TemplateField HeaderText="Action">
<ItemTemplate>
<asp:LinkButton ID="LnkEdit" runat="server" CausesValidation="false"
CommandArgument='<%#Eval("Id") %>' CommandName="Edit1"
OnClientClick="return confirm('Are you sure?')" Text="Edit" />
<asp:LinkButton ID="LnkDelete" runat="server" CausesValidation="false"
CommandArgument='<%#Eval("Id") %>' CommandName="Delete1"
OnClientClick="return confirm('Are you sure?')" Text="Delete" />
</ItemTemplate>
</asp:TemplateField>
</Columns>
<EditRowStyle BackColor="#7C6F57" />
<FooterStyle BackColor="#1C5E55" ForeColor="White" Font-Bold="True" />
<HeaderStyle BackColor="#1C5E55" Font-Bold="True" ForeColor="White" />
<PagerStyle BackColor="#666666" ForeColor="White" HorizontalAlign="Center" />
<RowStyle BackColor="#E3EAEB" />
<SelectedRowStyle BackColor="#C5BBAF" Font-Bold="True" ForeColor="#333333" />
<SortedAscendingCellStyle BackColor="#F8FAFA" />
<SortedAscendingHeaderStyle BackColor="#246B61" />
<SortedDescendingCellStyle BackColor="#D4DFE1" />
<SortedDescendingHeaderStyle BackColor="#15524A" />
</asp:GridView>
<br />
<asp:LinkButton ID="lnkEntryPage" OnClick="lnkEntryPage_Click" CausesValidation="false" runat="server">Add New Emp</asp:LinkButton>
</div>
</asp:View>
</asp:MultiView>
</div>
</form>
</body>
</html>
Step4: Create the BE layer and write the code like this
using System;
using System.Collections.Generic;
using System.Linq;
using System.Text;
using System.Threading.Tasks;
namespace BE
{
public class EmpBE
{
public int Id { get; set; }
public string EmpName { get; set; }
public string EmpAddress { get; set; }
public string MobileNo { get; set; }
public string EmailId { get; set; }
public string Img1 { get; set; }
}
}
Step 5: Create the DAL layer, write all database related code like this
using System;
using System.Collections.Generic;
using System.Linq;
using System.Text;
using System.Data;
using System.Data.SqlClient;
using System.Threading.Tasks;
using BE;
namespace DAL
{
public class EmpDAL
{
public int SaveEmpData(EmpBE objBE)
{
using (SqlConnection con = new SqlConnection(Helper.GetConnectionString()))
{
// Note:Change this code to store procedure
using (SqlCommand cmd = new SqlCommand("InsertEmpDetail", con))
{
cmd.CommandType = CommandType.StoredProcedure;
cmd.Parameters.AddWithValue("@Id", objBE.Id);
cmd.Parameters.AddWithValue("@EmpName", objBE.EmpName);
cmd.Parameters.AddWithValue("@EmpAddress", objBE.EmpAddress);
cmd.Parameters.AddWithValue("@MobileNo", objBE.MobileNo);
cmd.Parameters.AddWithValue("@EmailId", objBE.EmailId);
cmd.Parameters.AddWithValue("@Img1", objBE.Img1);
con.Open();
return cmd.ExecuteNonQuery();
}
}
}
public int UpdateEmpData(EmpBE objBE)
{
using (SqlConnection con = new SqlConnection(Helper.GetConnectionString()))
{
// here we have wiiten main logic in store procedure, Please check the storeprocedure
using (SqlCommand cmd = new SqlCommand("UpdateEmpData", con))
{
cmd.CommandType = CommandType.StoredProcedure;
if (objBE.Img1 == string.Empty)
{
cmd.Parameters.AddWithValue("@Img1", DBNull.Value);
}
else
{
cmd.Parameters.AddWithValue("@Img1", objBE.Img1);
}
cmd.CommandType = CommandType.StoredProcedure;
cmd.Parameters.AddWithValue("@Id", objBE.Id);
cmd.Parameters.AddWithValue("@EmpName", objBE.EmpName);
cmd.Parameters.AddWithValue("@EmpAddress", objBE.EmpAddress);
cmd.Parameters.AddWithValue("@MobileNo", objBE.MobileNo);
cmd.Parameters.AddWithValue("@EmailId", objBE.EmailId);
con.Open();
return cmd.ExecuteNonQuery();
}
}
}
public int DeleteEmpData(EmpBE objBE)
{
using (SqlConnection con = new SqlConnection(Helper.GetConnectionString()))
{
// here we have wiiten main logic in store procedure, Please check the storeprocedure
using (SqlCommand cmd = new SqlCommand("DeleteEmpDetail", con))
{
cmd.CommandType = CommandType.StoredProcedure;
cmd.Parameters.AddWithValue("@Id", objBE.Id);
con.Open();
return cmd.ExecuteNonQuery();
}
}
}
public List<EmpBE> GetEmpDetail(EmpBE objBE)
{
List<EmpBE> emps = new List<EmpBE>();
using (SqlConnection con = new SqlConnection(Helper.GetConnectionString()))
{
using (SqlCommand cmd = new SqlCommand("SelectEmpDetailOnId", con))
{
con.Open();
cmd.CommandType = CommandType.StoredProcedure;
if (objBE.Id == 0)
{
cmd.Parameters.AddWithValue("@Id", DBNull.Value);
}
else
{
cmd.Parameters.AddWithValue("@Id", objBE.Id);
}
SqlDataReader dr = cmd.ExecuteReader();
while (dr.Read())
{
EmpBE obj = new EmpBE();
obj.Id = Convert.ToInt32(dr["Id"]);
obj.EmpAddress = dr["EmpAddress"].ToString();
obj.EmpName = dr["EmpName"].ToString();
obj.MobileNo = dr["MobileNo"].ToString();
obj.Img1 = dr["Img1"].ToString();
obj.EmailId = dr["EmailId"].ToString();
emps.Add(obj);
}
return emps;
}
}
}
}
}
Step6: Create one helper class for storing the connection string like this in DAL
public class Helper
{
public static string GetConnectionString()
{
string Conn = "Data Source=.\\SQLEXPRESS;Initial Catalog=Test;Integrated Security=True";
return Conn;
}
}
Step 7: Create BAL layer. This layer is mainly used to pasing data from UI layer to DAL. We can also keep the bussiness validation logic.The code will be like this
using System;
using System.Collections.Generic;
using System.Linq;
using System.Text;
using System.Threading.Tasks;
using BE;
using DAL;
namespace BAL
{
public class EmpBAL
{
public int SaveEmpData(EmpBE objBE)
{
EmpDAL objDAL = new EmpDAL();
return objDAL.SaveEmpData(objBE);
}
public int DeleteEmpData(EmpBE objBE)
{
EmpDAL objDAL = new EmpDAL();
return objDAL.DeleteEmpData(objBE);
}
public List<EmpBE> GetSelectedEmp(EmpBE objBE)
{
EmpDAL objDAL = new EmpDAL();
return objDAL.GetEmpDetail(objBE);
}
public int UpdateEmpData(EmpBE objBE)
{
EmpDAL objDAL = new EmpDAL();
return objDAL.UpdateEmpData(objBE);
}
}
}
Step8: Now the write code for code behind page of Home.aspx like this
using System;
using System.Collections.Generic;
using System.Linq;
using System.Web;
using System.Web.UI;
using System.Web.UI.WebControls;
using System.IO;
using BE;
using BAL;
namespace _3Tier_Sample
{
public partial class Home : System.Web.UI.Page
{
protected void Page_Load(object sender, EventArgs e)
{
if (!IsPostBack)
{
MV1.ActiveViewIndex = 1;
FillGrid();
}
}
bool CheckFileType(string fileName)
{
string ext = Path.GetExtension(fileName);
switch (ext.ToLower())
{
case ".jpeg":
return true;
case ".jpg":
return true;
case ".gif":
return true;
default:
return false;
}
}
private void FillGrid()
{
try
{
EmpBE objEmpBE = new EmpBE();
EmpBAL objEmpBLL = new EmpBAL();
GridView1.DataSource = objEmpBLL.GetSelectedEmp(objEmpBE);
GridView1.DataBind();
}
catch
{
}
}
protected void BtnSubmit_Click(object sender, EventArgs e)
{
try
{
EmpBE objEmpBE = new EmpBE();
EmpBAL objEmpBLL = new EmpBAL();
objEmpBE.EmpName = txtEmpName.Text;
objEmpBE.EmpAddress = txtEmpAddress.Text;
objEmpBE.EmailId = txtEmailId.Text;
objEmpBE.MobileNo = txtMobileNo.Text;
if (HiddenField1.Value != string.Empty)
{
objEmpBE.Id = Convert.ToInt32(HiddenField1.Value);
}
if (fileUploadEmpImg.HasFile)
{
if (CheckFileType(fileUploadEmpImg.FileName))
{
String filePath = "~/Empimg/" fileUploadEmpImg.FileName;
fileUploadEmpImg.SaveAs(MapPath(filePath));
}
}
objEmpBE.Img1 = fileUploadEmpImg.FileName;
if (BtnSubmit.Text == "Submit")
{
int flag = objEmpBLL.SaveEmpData(objEmpBE);
if (flag == -1)
{
MV1.ActiveViewIndex = 1;
FillGrid();
clearData();
}
}
else if (BtnSubmit.Text == "Update")
{
int flag = objEmpBLL.UpdateEmpData(objEmpBE);
if (flag == -1)
{
MV1.ActiveViewIndex = 1;
FillGrid();
clearData();
}
}
}
catch
{
}
}
private void clearData()
{
txtMobileNo.Text = string.Empty;
txtEmpName.Text = string.Empty;
txtEmpAddress.Text = string.Empty;
txtEmailId.Text = string.Empty;
}
protected void GridView1_RowCommand(object sender, GridViewCommandEventArgs e)
{
try
{
EmpBE objEmpBE = new EmpBE();
EmpBAL objEmpBLL = new EmpBAL();
if (e.CommandName == "Delete1")
{
int id1 = Convert.ToInt32(e.CommandArgument);
MV1.ActiveViewIndex = 1;
objEmpBE.Id = id1;
int flag = objEmpBLL.DeleteEmpData(objEmpBE);
if (flag == -1)
{
FillGrid();
}
}
else
{
MV1.ActiveViewIndex = 0;
int id1 = Convert.ToInt32(e.CommandArgument);
objEmpBE.Id = id1;
List<EmpBE> emps = new List<EmpBE>();
emps = objEmpBLL.GetSelectedEmp(objEmpBE);
txtEmailId.Text = emps[0].EmailId.ToString();
txtEmpAddress.Text = emps[0].EmpAddress.ToString();
txtEmpName.Text = emps[0].EmpName.ToString();
txtMobileNo.Text = emps[0].MobileNo.ToString();
HiddenField1.Value = emps[0].Id.ToString();
BtnSubmit.Text = "Update";
}
}
catch
{
}
}
protected void GridView1_PageIndexChanging(object sender, GridViewPageEventArgs e)
{
}
protected void GridView1_RowEditing(object sender, GridViewEditEventArgs e)
{
}
protected void GridView1_RowDeleting(object sender, GridViewDeleteEventArgs e)
{
}
protected void LnkViewAll_Click(object sender, EventArgs e)
{
MV1.ActiveViewIndex = 1;
}
protected void lnkEntryPage_Click(object sender, EventArgs e)
{
MV1.ActiveViewIndex = 0;
clearData();
}
}
}
In this application i have used the following store procedure
1. For delete operation
CREATE PROCEDURE [dbo].[DeleteEmpDetail]
@Id int
AS
BEGIN
SET NOCOUNT ON;
Delete from tblEmpDetail where Id=@Id
END
2. For Insert operation
CREATE PROCEDURE [dbo].[InsertEmpDetail]
@Id int,
@EmpAddress varchar(250),
@EmpName varchar(150),
@MobileNo varchar(20),
@EmailId varchar(150),
@Img1 varchar(250)
AS
BEGIN
SET NOCOUNT ON;
— Insert statements for procedure here
Insert into tblEmpDetail(EmpName,EmpAddress,MobileNo,EmailId,Img1) values(@EmpName,@EmpAddress,@MobileNo,@EmailId,@Img1)
END
3. For select operation
CREATE PROCEDURE [dbo].[SelectEmpDetailOnId]
– Add the parameters for the stored procedure here
@Id int
AS
BEGIN
SET NOCOUNT ON;
If @Id is null
Select * from tblEmpDetail
else
Select * from tblEmpDetail where Id=@Id
END
4. For update operation
CREATE PROCEDURE [dbo].[UpdateEmpData]
@Id int,
@EmpAddress varchar(250),
@EmpName varchar(150),
@MobileNo varchar(20),
@EmailId varchar(150),
@Img1 varchar(250)
AS
BEGIN
SET NOCOUNT ON;
If @Img1 is null
Update tblEmpDetail set EmpName=@EmpName,EmpAddress=@EmpAddress,MobileNo=@MobileNo,EmailId=@EmailId where Id=@Id
else
Update tblEmpDetail set EmpName=@EmpName,EmpAddress=@EmpAddress,MobileNo=@MobileNo,EmailId=@EmailId,Img1=@Img1 where Id=@Id
END
I hope this post will help to some one.

Sunday, 9 June 2013

How to Setup Windows 7 from USB drive through Power ISO

How to Setup Windows 7 from USB drive?
You are here:  Tutorials > How to setup Windows 7 from USB drive?

Step1: Create Bootable USB Drive:
  1. Start PowerISO (v4.8 or newer version, download here).
  2. Insert the USB drive you intend to boot from.
  3. Choose the menu "Tools > Create Bootable USB Drive". The "Create Bootable USB Drive" dialog will popup. If you are using Windows Vista or Windows 7 operating system, you need confirm the UAC dialog to continue.
  4. In "Create Bootable USB Drive" dialog, click "..." button to open the iso file of Windows 7.
  5. Select the correct USB drive from the "Destination USB Drive" list if multiple USB drives are connected to the computer.
  6. Choose the proper writing method. "USB-HDD" is recommended.
  7. Click "Start" button to start creating windows 7 bootable USB drive.
If no errors occured in the above process, you should now be all set to setup Windows 7 from USB drive!

Step 2: Configuring the BIOS:
You should now reboot and go into the BIOS configuration to boot from USB. Instructions for doing so wildly from system to system, but generally entail the following:
  1. Reboot the system.
  2. While booting (before Windows starts loading), get into the BIOS configuration screen by hitting something like F1, F2, Delete or Escape. Hotkey instructions are generally provided on the screen.
  3. Go to the section that contains your boot devices.
  4. With your USB drive plugged in, the USB drive should be listed. If it isn’t, your system might not support booting from USB. Assuming that it is supported (as is the case with virtually all modern hardware), promote your USB drive to the primary boot device.
  5. Exit from the BIOS configuration, saving all changes.
If you’re completely new to BIOS configuration, BIOS for Beginners over at Tom’s Hardware might be a good primer. Be aware though, that you can seriously screw up your system by providing incorrect settings!

Step 3: Booting and setup windows 7 from USB drive:
Assuming that you properly configured your BIOS and your USB drive supports booting,  Windows 7 setup should now load. Depending on the speed of your USB drive, this may take a while.
If it isn’t working, then double-check the following before making a scene:
  • Is your BIOS properly configured for booting from the USB device? (Is the USB device listed and does it have top priority?)
  • Have you correctly prepared the USB drive in step one? (Restart the procedure.)
  • Does your USB drive properly support being booted from? (Try another one!)
Note: The above guide works with Windows Vista / Windows 7 only. For Windows XP with SP2 or SP3 please refer to another guide athttp://www.poweriso.com/tutorials/how-to-make-winxp-bootable-usb-drive.htm .

How to create a bootable USB to install OS X

How to create a bootable USB to install OS X

Takeaway: Jesus Vigo goes over the steps to create a bootable USB to install OS X 10.7-10.8 and OS X 10.5-10.6, as well as how to put multiple versions on the same USB.
With the advances in technology, faster data access (SSD), and slimming hardware footprints, legacy technologies are typically the first cuts made to get these devices thinner and lighter while making them more powerful and efficient.
Installing OS X has never really been a particularly difficult task, but try doing that on a MacBook Air or a system with a broken optical drive. Not so easy anymore is it? Even downloading the OS from the Mac App Store wouldn’t do when the hard drive needs replacing or the Recovery Partition is corrupt. Luckily, Macs have a couple of options, specifically USB booting, and since most have an SD card slot, we can use those as well.

Creating a USB Installer for Apple OS X 10.7-10.8

Before proceeding, we’ll need the following items to complete the process:
  • 8GB USB Flash Drive (or SD Card)
  • Install OS X Mountain Lion.app (installer downloaded from Mac App Store)
  • Apple computer with Mac App Store (OS X 10.6.8+)
  • User Account with Administrative privileges
Follow these steps:
1.     Using a Mac with at least OS X 10.6.8 installed, access the Mac App Store and download the Lion (10.7) or Mountain Lion (10.8) app installer.
2.     Insert the USB drive into the Mac and launch Disk Utility.
3.     Click on the USB drive from the left-hand menu and select the Partition tab.
4.     Click the drop-down menu, selecting 1 partition.
5.     Select Mac OS Extended (Journaled) for the format-type from the drop-down menu. (Figure A)
6.     Click on the Options button and select the radio button for GUID Partition Table and click OK.  (Figure B)
7.     Upon completion of the USB formatting, locate Install Mac OS X Mountain Lion.app(downloaded in step #1 to the Applications folder, by default). Right-click the file and select Show Package Contents. (Figure C)
8.     Navigate the file structure Contents | Shared Support and drag the InstallESD.dmg file to the desktop. (Figure D)
9.     Go back to Disk Utility and click on the newly formatted USB Drive in the menu, then click on the Restore tab.
10.  In the Source textbox, click the Image button and select the InstallESD.dmg file on your Desktop. For Destination, drag & drop the partition created on the USB drive onto the textbox. (Figure E)
11.  Upon verifying that the fields are correct, click the Restore button and select Erase from the application, if prompted to do so. (Figure F)
12.  The process may indicate in excess of one hour, but in my experience the process takes significantly less time to complete. (Figure G)

Creating a USB Installer for Apple OS X 10.5-10.6

The process is nearly identical, with a few alternate items to complete the process:
  • 8GB USB Flash Drive (or SD Card)
  • Apple OS X Install DVD*
  • Apple computer with (OS X 10.5+)
  • Built-in or USB Optical Drive
  • User account with Administrative access
*Note: Install DVD must be the original DVD from Apple and not a Restore DVD that came with earlier model Apple computers & laptops. The process has not been tested with Restore DVDs and may not yield a reliable, OS X Installer USB.
  1. Insert Apple OS X Install DVD into Optical Drive.
  2. Launch Disk Utility and click on the OS X Install DVD from the left-hand menu.
  3. Click on the Restore tab and verify that the Mac OS X Install DVD appears in the Source text box.
  4. Drag & drop the formatted USB drive partition to the Destination textbox. (If you did not format the USB drive, please follow steps #2-6 from the 10.7/10.8 tutorial above) then continue on to step #5 below. (Figure H)
  5. Upon verifying that the fields are correct, click the Restore button. Select Erase from the confirmation box, if prompted to do so.
  6. If asked to authenticate, enter credentials that have administrator access and click OK to proceed.
  7. Since this scenario requires reading data from the optical drive, it may perform slower than reading files that are located on the hard drive.
Once completed, the USB drive will be bootable and have the full installation of OS X on there to install from scratch and update systems, as needed. Remember, this being a writable drive offers some additional perks over read-only media with a few caveats as well.
Pros:
  • Include additional resources on the drive that are required by your organization, such as Combo Updaters, applications or settings.
  • Backup directories prior to initializing the HDD and/or reinstalling OS X.**
  • Include multiple versions of OS X on the same drive.**
Cons:
  • Writable means live data can be subject to accidental deletion or corruption.
  • Read/Write speeds vary wildly depending on the make/model of the USB drive. Choose the highest read and write speeds for your particular application to minimize this bottleneck.
  • Loss/theft of USB drives and any additional data, such as configurations, passwords, etc. that may be contained therein. Be careful!
**Note: Feel free to include any additional files or folders to the existing drives, so long as the original file hierarchy is not modified in any way. This is important as the OS X installer is looking for specific files at specific locations during installation. A missing, modified or corrupt file could result in an unreliable installation.

Multiple OS X versions on the same USB/SD card (Bonus)

While writing this article, I found myself in a predicament - I only had a 8GB USB drive! But luckily, I found a 16GB drive I’d lent my wife awhile back and decided to try to get the two versions of OS X encountered most frequently (10.7 & 10.8) onto the same 16GB USB drive.
And it worked! To achieve this, you’ll want to have a USB/SD card capable of holding all the OSs on drive. This means about 8GB of storage space per version of OS X. The steps are identical to the Creating a USB Installer for Apple OS X 10.7-10.8 tutorial listed above, except for two keydifferences.
  1. Instead of selecting “1″ partition in step #4, you’ll be selecting a number equal to the number of versions of OS X you’ll be copying over. (Ex. If housing 10.5/10.6/10.7/10.8; 8GB x 4 versions of OS X = 32GB total; 4 partitions will then need to be created).
  2. The copying process (steps #9-12) will now need to be repeated once for each version of OS X being stored.
TipBy default, Disk Utility names the partition identical to the source “Mac OS X Install DVD” in my case. While thoughtful, if working with multiple partitions, each will have the same name making them indistinguishable from the others. To resolve this, once the entire copy process has completed for all versions of OS X, the Finder will mount them all on the Desktop. Go through each to identify which version of OS X is contained, then simply rename it to a common name, such as 10.7 for the Lion installer; 10.8 for Mountain Lion, etc. When booting to the USB/SD card by holding the Option key during start-up, the drives will mount with their new names making them easier to identify.